
Are you tired of spending endless hours adjusting and re-adjusting your embroidery project? Hooping fabric correctly on an embroidery machine can be tricky, but with the right techniques you can save time and get beautiful results!
In this article, you’ll learn how to properly hoop fabric for your next embroidery project.
The embroidery hooping process is an essential part of any embroidery project. Properly hooped fabric allows for accurate stitching and professional quality results. Having the right tools and knowledge of fabric types can help to ensure success in this important step. This guide provides an overview of the basics of hooping fabric on an embroidery machine.

- Tools Needed Hooping requires several key items, including an appropriate-sized hoop for your embroidery project, water-soluble stabilizer, thread snips, tape measure or ruler, and a marking pen or chalk pencil. Additionally, you’ll need adhesive spray or double-sided tape to hold the fabric in the hoop while you stitch it out. Finally, water spray bottle is often helpful for wetting fabrics to potentially prevent distortion when they are stitched out with a hoop; especially thicker fabrics that have been starched or heavily pressed with sizing prior to stitching them out on your machine.
III. Types of Fabrics When choosing fabrics to work with on your embroidery machine, understanding how each fabric type behaves in the hoop can be beneficial for getting a successful result from your project – not every type works well in an embroidery hoop due to its potential thickness or degree of stretchiness when wet. Start by selecting fabrics that are recommended for use in manual sewing and craft projects such as cotton blends (shirting fabric); medium weight wovens such as linen; canvas; light to medium weight leathers; felt; and synthetics such as polyester jersey knits which are perfect for T-shirt decals like numbers and letters on sports wear. Avoid heavier weight upholstery-grade fabrics that have heavy coatings/backings which could damage your machine’s throat plate area when stitched over top of it many times like in some border designs – choose special tear away interfacing instead when stitching designs over these types of thicker fabrics.
Explanation of the importance of proper hooping in machine embroidery
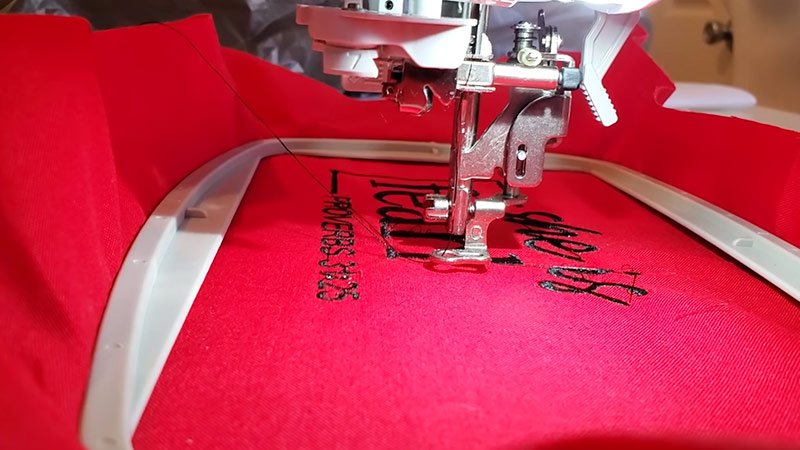
Hooping fabric properly on an embroidery machine is a key step in the process of successfully completing an embroidery project. Hooping refers to the act of securely fastening your fabric into a hoop, which is placed under the embroidery machine’s needle. The secret to creating great, professional-looking results is to ensure a tight fit and proper positioning of your fabric in the hoop.
When creating an embroidered piece, proper hooping helps maximize accuracy and stability of your stitch pattern, as well as minimize distortion or pucker of your fabric due to thread tension. It ensures that your threads will be evenly distributed throughout each design and that all parts of the pattern will remain intact during more complex stitching techniques. Additionally, any stretch in the material should be considered when hooping so that it will not pull out of shape while being worked on.
To properly hoop fabric on an embroidery machine, follow these tips:
- Make sure that the hoop used is slightly larger than the size of your design;
- Securely fix your fabric in the frame by fastening it with curve ends (resembling a dryer sheet);
- Do not over-tighten or strain your material;
- Position correctly before starting—check for quality assurance; and
- Frequently remove and replace hops frames to reduce skipping/uneven stitches or incorrect color registration in multi-colored designs.
Types of Hoops
Before you begin hooping the fabric, you’ll need to select the right hoop for your fabric and layout. There are several types of hoops available that work with different materials and embroidery layouts.
Round Hoops: Round hoops come in many sizes and are commonly used for garments, linens, soft furnishings, knits, and similar materials. Smaller hoops are typically used for smaller items such as caps, pockets or children’s clothing.
Rectangular Hoops: Rectangular or oval-shaped hoops offer more space than round hoops and can be used to create larger designs on larger pieces of fabric like towels, blankets or stadium blankets. They are often preferred when embroidering logos on commercially produced items.

Multi-Position Hoops: Multi-position hoops have a long arm that adjusts across the surface of the fabric to provide an area for even larger designs than standard rectangular hoops can offer. They also allow for multiple angles and positions within the same hoop so you can move around the design without having to rehoop it after each part is complete.
Specialty Hoops: Specialty hoops come in various shapes such as a hat tacker frame that allows users to easily hoop small objects such as hats without having to stitch through multiple layers of fabric — which can lead to distortion or other stitching problems. Other specialty shapes may include frames designed specifically for towels and handkerchiefs with distinctive edges as well as continuous border frames which provide an even border around a large frame without interruption from any additional frame parts like with standard multi-position frames do.
Round hoops
Round hoops are the most commonly used types of hoops with an embroidery machine. They come in many shapes and sizes so it’s important to always check the manufacturer guidelines for the best size for your project. The main advantage of round hoops is that they can fit anywhere on the fabric, allowing you to place your designs in any preferred location.
To properly hoop fabric using a round hoop, start by positioning the design area over the inner ring of the hoop. The target fabric should be below and above both rings of the hoop, and pulled snugly around them. There should be no wrinkles or puckers in your design area; if there are any present, you can use a spray adhesive to help create a more even surface before working with your needle and thread. It’s also important to make sure that all four corners of your design area stay properly secured within both rings when you begin stitching your design.
Square hoops
Square hoops are the most commonly used because they offer versatility within the embroidery design process. The biggest challenge here is ensuring that the fabric is properly secured in the hoop to avoid any thread breaks or fabric shifting while hooping. Here are some tips on hooping with a square hoop on your machine:
- Place stabilizer over the top of the fabric and smooth it out, tucking it around any inside edges. Stabilizer gives an extra layer of support when you’re creating embroidery designs to help keep things from stretching or puckering over time once it has been washed or handled frequently.
- Position the hoop underneath so that all four sides are even and centered in relation to each other and to the design placement area. Pay special attention to corners and side edges – this will help give you even spacing when finishing up with your threading job too.
- Lock your hoop into position with screws or latches if available, making sure not to tug too tightly because this can cause distortions of its own! Carefully use a pen or stylus tool for tracing around outside borders before adding any additional support so that you’re working within an even frame throughout project-time usage as well as after washing/handling post-completion processes too!
III. Hooping Fabric
Hooping the fabric is an important step, and part of a successful embroidery job depends on it. Knowing how to properly hoop fabric on an embroidery machine will ensure that you get great results every time. Here are some helpful tips for hooping fabric:
- Choose the right size hoop for your project: You should always use the smallest hoop that will accommodate your design so that you don’t have too much bulk inside of your embroidery machine.
- Position the fabric in the hoop carefully: Make sure that you position it in a square fashion, with each corner touching equally, so that all four corners remain in contact with the sides of your hoop as you stitch.
- Securely fasten the hoop: Once you have placed your material into the hoop, make sure to securely fasten it before proceeding with stitching.

- Handle the hoops correctly: To prevent any damage or distortion when putting them into and taking them out of your machine, always hold onto both sides of the hoops at each corner when handling them and be sure to avoid sliding it across any surfaces as this can cause wear-and-tear over time.
- Balance tension levels evenly: Make sure to distribute tension levels evenly along each side of your fabric by using an appropriate amount of pressure while hooping so as not to cause any unnecessary gaps or shifts during sewing stages or post-stitching processes such as cutting threads and trimming excess material away from design areas etcetera.
Centering the marked fabric over the hoop
Centering the marked fabric over the hoop is critical to ensure that the image will be embroidered in the correct location and with an even, balanced stitch out. The fastest, most accurate way to hoop fabric on an embroidery machine is by using a specially designed hooping device; however, if you don’t have access to such a device then make sure you allow enough fabric around your design so that it can be hooped properly. Here are some tips on how to center the marked fabric over the hoop:
- Take note of your design area and mark it with dots or arrows on both sides of the hooped fabric, paying particular attention if it’s a repeating pattern.
- Make sure you line up one side first and then trim away any excess material before moving onto the opposite side.
- Double check that all sides are equally lined up with your marks before beginning to lower your hoop onto the machine bed.
- If needed, use a ruler or other straight line guidance tool to help line up materials correctly over hoops.
- Once everything looks good from top and bottom, tighten all screws of your hoop securely by hand or use an Allen key for maximum rigidity — but take care not to overtighten!
Pulling the fabric taut over the hoop
Pulling the fabric taut over the hoop is an important step when embroidering with any type of fabric. Stretching the material evenly and consistently around the hoop is key for successful embroidery and prevents puckering, which can occur if not done properly. The best way to do this is to use two hands, one on either side of the hoop, and gently pull as you guide the material over. This will ensure that you get an even tension throughout and that all areas stay taut in relation to each other as you snug up your fabric within the hoop.
Once your fabric has been stretched around the hoop, it’s time to secure it in place using a method known as ‘floating’ – using temporary adhesives applied directly to your embroidery machine’s work surface – or by hand-tightening a screw on both sides of the outside frame of your hoop (depending on what type of machine you have). Whichever securing method you choose, be sure that it properly holds down all sections of your material so there are no gaps or wrinkles where they should not be before starting to embroider.
Checking Hoop Tension
Once the fabric is hooped and secured into place, the hoop tension should be checked. This is critical in order to obtain a consistent stitch quality. Too little tension can result in weak stitches that are sparse and uneven, while too much tension can cause puckering in the fabric and thread breakage.
To check your hoop tension, tug on both sides of the frame to make sure it feels tight but isn’t overly so. The two sides should move independently, with no give when pushed or pulled on either side.
If there is any possible adjustment required, refer to your machine’s manual for instructions on how to properly adjust your hoop tension settings.
Pulling on the fabric to check the hoop tension
Pulling on the fabric is one way to ensure that it is placed correctly in the hoop and that there is enough tension. Gently pull up on the fabric from all four sides of the hoop before beginning your embroidery piece to ensure that nothing will slip or move out of place during the machine stitch process.
Tarred embroidery machines have an adjustable tension knob located near the arm of your machine which can help ensure a more secure grip on the fabric with less chances for pulling and distorted edges. Make sure to not over tighten this knob though, as it can cause damage to both your fabric and your machine itself.
Once everything looks square and snug, you are ready to start stitching.
Adjusting the tension if necessary
In order to get a professional finish for your embroidery designs, it is important to adjust the tension of the hoop if necessary. Tension should be equal at each point around the perimeter of the hoop. Too much tension will cause puckering and pulling while too little tension can result in designs that are distorted or off-center. Make sure that you adjust both sides of the hoop evenly and make sure you’re not over tightening it, as this can damage your fabric or thread.
To check the tension, hooping a scrap piece of material will help you determine whether you need to adjust it or not. Once your fabric is hooped, gently pinch it at different points around the perimeter with your fingers and adjust tension as needed until a consistent feel is achieved all around. If needed, use an embroidery machine’s adjustable screw or clip to make fine adjustments if necessary. Finally, secure any clips on each side of the frame before testing out your project!
Conclusion
Whether you are just starting out or have had plenty of experience embroidering, this guide should have helped you learn how to properly hoop fabric on an embroidery machine. It’s important to start with a clean workspace and the right supplies, measure your fabric carefully, position your hoop correctly and prepare the fabric for hooping. Remember to use only light tension when hooping and use stabilizers as needed.
Once it’s time to remove the hoop from your machine, make sure to do so slowly and carefully. Carefully unhoop the fabric by loosening any final tension that may be left on it. The last step is even more important—rising both your fabric and stabilizer in warm water is crucial as this will preserve their color and texture for many years of enjoyment. By following these simple steps for successful hooping of fabric on an embroidery machine you can guarantee beautiful results every time.
See Also-
- Best Embroidery Machine For Hoodies 2023
- Best Embroidery Machine 2023
- Best Embroidery Machine Under $1000 In 2023
- Best Embroidery Machine For Monogramming 2023
- Best Embroidery Machine For Hats 2023