
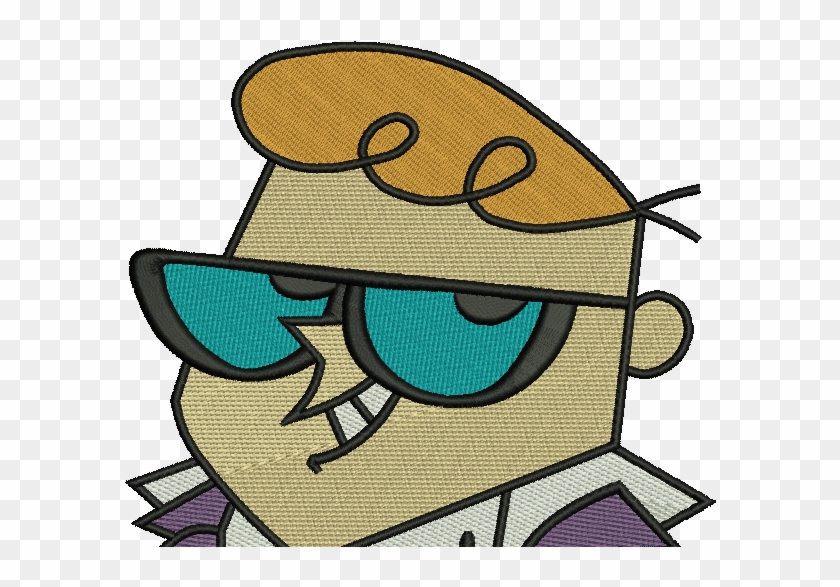
Are you looking to make custom embroidery designs for yourself or others? You can create beautiful, intricate patterns with the help of an embroidery machine.
Learn how to create unique, custom designs in this guide!
Creating custom embroidery designs with your machine is an easy, fun way to add a personal touch to your projects. Whether you’re working on a t-shirt, bag, hat or other type of fabric item, creating unique and attractive embroidery is simple and rewarding. In this article, we’ll explain how to select the right materials and tools for creating custom embroidery designs with your machine. We’ll also provide step-by-step instructions for designing and stitching your own custom designs.

Before you begin developing your design, it’s important to understand the different types of designs available for machine embroidery. Included in this guide are instructions on how to create computer-generated designs using a program like Adobe Illustrator or CorelDraw as well as manually drawn designs using specialty software such as Floriani Total Control U® or Brother PE Design® . There are also ready-made embroidery patterns sold commercially both online and in stores. Each of these options has its own benefits.
Regardless of which type of design you choose, there are some things that will be necessary for producing a successful creation:
- High quality thread and fabric
- Embroidery needles in various sizes
- An iron
- Scissors or pinking shears
- Hoop stabilizer or backing material
Explanation of custom embroidery designs
Custom embroidery designs are unique and personalized pieces of art that you can make with your own embroidery machine. This flexibility allows you to make one-of-a-kind pieces for use in a variety of items. It is important to understand the basics of custom embroidery designs before you begin so that you can create beautiful pieces with ease and accuracy.
Typically, embroidery designs are created from a computer program, though there also exist more traditional techniques such as software and hand stitching. Programs are available for both Windows and Mac operating systems, providing a wide range of customization options. Depending on the capabilities of your machine, these programs may contain design elements like fill stitches, appliqués, lettering fonts or decorative motifs — all at the discretion of the creator! These elements can then be assembled together to create an attractive design that will have a personalized look and feel. Other optional features include motif outlining or adding special effects such as outlining with triple stitch or beads.
When creating your own custom designs it is essential to ensure accuracy by using precise measures such as inch or millimeter settings. This will help ensure uniformity among all parts of your design and allow for re-stitching if necessary due to flaws that were not initially evident before stitching began. Additionally for those who are not familiar programming software programs may offer tutorials so users can learn precisely how to operate their equipment in order to best achieve their desired results safely and efficiently!
Preparing for custom embroidery design creation
Before beginning the custom embroidery design creation process on your machine, it is important to ensure that you have all the necessary supplies and materials. This includes designs, an embroidery machine, thread colors, scissors/snips, stabilizer of varying sorts, fabric and a few other items.
Designs – Choosing the right design(s) for your project is integral to the success of the finished product. It is important to choose a design realistic to its size in correlation with the project it will be used for (i.e., if making a shirt using small lettering for the design make sure that the letters do not exceed 1”). One may also choose between monogrammed and basic designs or from thousands of available fonts in order to personalize a custom embroidery project.
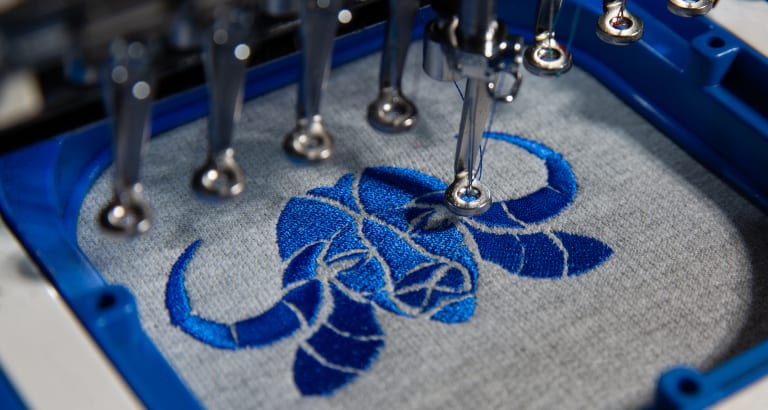
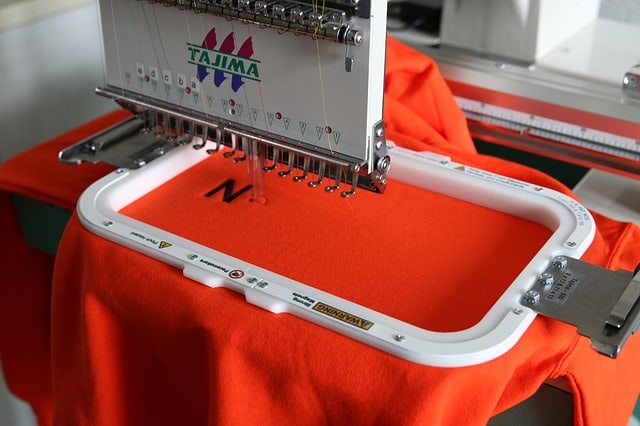
Embroidery Machine – It’s necessary to have an embroidery machine in order to create custom designs for items such as shorts or hats, however one does not necessarily need an Internet connection or special software in order to run it. The most efficient machines should also have features such as automatic trimming and intelligent needle movement which can help improve efficiency while producing high-quality products.

Thread Colors – When selecting thread colors there are many things that must be taken into consideration such as what element each color will represent within a graphically designed layout (i.e., lines, shading). It is essential to use threads which match closely with Pantone standards in order to maintain accurate color matching amongst various elements of one’s design(s).
Stabilizers – Stabilizers are often used when creating anything involving embroidery since they help secure materials onto a base layer while ensuring fabric flexibility during certain intricate patterns within different projects . Stabilizers come in multiple varieties from lightweight Perfect Cut pieces meant for lighter material construction pieces such as t-shirts or handkerchiefs; Medium Cut stabilizers designed for lamp shade covers and unstructured garments; Heavy Cut Layers suitable for upholstery fabrics; and Water Soluble varieties meant for complex stitch patterns over thin fabrics like lingerie/undergarments .
Fabric & Accessories – Or course what would designing be without choosing compatible fabrics? Since every fabric necessitates different types of care methods with regards stabilizer application failure-to-do so could lead to irreparable finishing defects on any clothing item being produced by means of the aforementioned methods previously defined herein. Additionally depending on whether you select woven or knit fabrics extra attention must be paid since they will require either bobbin tensioning placement modifications coupled with needle configuration changes accordingly along your journey towards finished product perfectionism! Finally one needs other basic accessories such as pins, hoop frames/blocks , adhesive no stick spray , chalk wheels , needles , snips etc…in order complete their unique masterpiece!
Required materials and tools
Before you start the process of creating your own custom embroidery designs, it’s important to make sure that you have everything you need. If you plan to digitize an existing design or work with an embroidery software program like Wilcom or Pulse, be sure that the computer and/or software used is compatible with your machine.
In addition to a computer, there are some other key tools and supplies necessary for successful embroidery design creation. You’ll need:
- Embroidery Machine: Most home hobbyists will use a single-head machine while commercial facilities may use a commercial multi-head model depending on the project demands. Make sure your machine is serviced regularly so that there are no problems when operating on the actual fabric.
- Design Program or Digitizing Software: This will depend on whether you plan to create simple patterns or complex designs with photos, logos or other images.
- Original Design Format: Most programs require that you load in artwork of some kind (for example .ai for Adobe Illustrator files) in order for them to create proper stitching files that can be read by a specific type of embroidery machine(s).
- Interfacing Material: Interfacing material provides structure and stability between the layers of any item being stitched upon so it’s important to make sure your interfacing meets all specified requirements given by whatever stitch file is being used.
- Tear Away Stabilizer: This stabilizer holds firmly during stitching but tears away easily afterwards leaving only clean seams behind after completion.
- Bobbins and Threads: Make sure to buy threads specifically designed for machine embroidery such as polyester core 40wt thread (for lighter designs) or even metallics and polyester cotton blend 50wt thread (for bigger projects). Buy an ample supply of bobbins as well; many times small projects will require more bobbin changes then expected when using large spools of thread.
Choosing an embroidery design software
Once you have chosen the right machine to serve your embroidery needs, it’s time to select a software program. There are many choices available, ranging from affordable programs designed for beginners and hobbyists to more expensive versions with more complex features that are ideal for professional stitching. Here is an overview of some of the software packages available:
Basic Design Software The basic design programs include some of the most user-friendly platforms that can be used by anyone from beginners to pros. Examples of these platforms include My Designs (3D), Embroidery Professional+, and Deco Studio. They are typically simple to use and require minimal training. They offer basic functions such as editing, aligning, resizing, as well as few special effects or advanced functions like monograms or lettering.
Intermediate Design Software At this level there are a variety of options to choose from including ZSK EmbroideryWorks Everyday which offers positioning options, multiple format compatibility and offsetting functions along with other features such as auto digitizing; VStitcher which provides realistic 3D imaging that helps visualize custom designs before they’re completed; Embird Editor with capabilities for merging images into one object; and Tajima DG/ML by Pulse with vector-based drawing tools for freehand drawing, redrawing scanned art files and digitizing embroidery graphics.
Advanced Design Software This category includes premium design programs such as multi-head embroidery solutions which can accommodate several machines on a network under one control system; production software featuring advanced design tools like CADsys Plus Premium fully integrated into one package; Simulation Solutions offering fabric simulation capability on the screen with actual correct fabrics textures and stitch simulations along with automatic color management capability; 3D visualization solutions enabling true 3D renderings so users can see their finished designs before ever starting stitching; or Vector based solutions using vector based artwork such as Adobe Illustrator or Corel Draw files that are converted into embroidery format within one package.
III. Steps for creating custom embroidery designs
Now that you have familiarized yourself with the features of your machine and all the necessary supplies, you can start to get creative. Learning how to create custom embroidery designs is an enjoyable, rewarding process – once you understand a few basic steps. Before you begin:
- Choose a design or motif that is simple, but allows for enough detail to keep it interesting – such as using a continuous line pattern for flowing elements like hearts or flowers.
- Check if the pattern size will fit into the hoop size of your machine and adjust the size if needed.
- If creating multiple copies of the same design, mark placement points on different pieces of fabric that correspond to its physical shape. This will make positioning easier when stitching multiple copies in a single operation.
- Unroll fabric from its roll and keep it flat while creating your project – follow these instructions:
- a) Thread your machine (refer back to Part I).
- b) Place hoop on machine’s arm and easy-slide tab into free arm slot (this secures the hoop).
- c) Attach fabric firmly in hoop using clips – draw provided template onto cloth with tailor’s chalk for precision before attaching fabric with frame side up and matching arrow keys on frame side with needle position keys on embroidery unit (this determines needle’s starting position).
- d) Press “Start/Stop” button located at upper corner of embroidery unit – this takes you into initial set-up procedure mode where LCD unit will show “Select Design” menu (refer back to Part II).
- e) Choose Design menu option by pressing enter button located directly below menu options keypad – insert USB device containing custom design file, select USB option under “Design Source”, open file folder containing custom design file, make appropriate selection by pressing Enter button again – LCD screen should now be visually displaying chosen custom pattern/embroidered layout view which contains fabrics color coordinates & thread details along with command options found beneath layoutview window.
Step 1: Choose a design or create a new one
Creating a custom embroidery design on your machine is an easy and fun way to express your creativity and add unique touches to your projects. Whether you purchase an existing design from an online marketplace, or create something unique from scratch, the process involves selecting a design, selecting the stitch settings and thread colors, and then stitching it out on fabric.
To get started on your project, you’ll first want to select a design. If you choose an existing file format (such as DST or PES), be sure it is compatible with the requirements of your machine’s software program. You can also use free embroidery software like Inkscape or CorelDraw to create designs from scratch. Once you have selected or created your design, you can use tracing function of the software program to view where each color will go. If available, make sure you preview the design in 3D before proceeding with the next step.
When ready to begin stitching out your project designs keep these tips in mind to make sure they turn out great: Choose good quality fabrics that are suitable for embroidery such as cotton or polyester blends; Make sure data cables are connected securely between computer and machine; Check colorfastness if using dyes; Use high quality threads in compatible weights for best results; Select appropriate stabilizers such as batting for thick layers of fabric; Follow manufacturer’s recommendations for stitch length and tension settings; Experiment with different thread placement techniques such as lace fillers, running stitches and outlining for textiles. After finishing stitching out the project designs press them lightly using a clean ironing pad before giving it away as personalized gifts!
Step 2: Digitize the design using embroidery software
Step 2: Digitize the design using embroidery software. To create embroidery designs with your machine, you will need to utilize a computer-aided design (CAD) program or an embroidery software application. These programs allow users to create custom, machine-readable instructions for embroidering text and designs onto fabric. Depending on the type and complexity of your design, you will use different levels of embroidery software ranging from entry-level CAD programs that offer basic features like digitizing images, to advanced programs that offer advanced features like creating custom appliques.
Before creating your design, familiarize yourself with all available features and settings in the software you are using. Generally speaking, each piece of work will require a unique set of settings based on the project specifications. This includes factors such as size, stitching techniques and colors used for the project. Additionally, if you have any special requests when creating your design – such as special colors or stitching techniques – make sure to specify them in this step.
Troubleshooting common issues when creating custom embroidery designs
Creating custom embroidery designs with your sewing machine can be a rewarding experience, but it can also present some challenges. It’s important to pay attention to detail when creating your design and be aware of any potential issues that might arise.
One common issue when creating custom embroidery designs is having difficulty getting the thread through all of the fabric layers properly. This is particularly true when using thick fabrics such as denim. A few tips for solving this issue include using a sharpened needle, loosening the tension wheel slightly, reducing the amount of material beneath the presser foot or increasing stitch length to widen the path for easier thread passage.
Another possible problem is related to your fabric or stabilizer shifting while stitching. To help prevent this, make sure to use temporary spray adhesive on dense fabrics, use a taut-stabilizer if you are dealing with bulky fabrics and use tear-away stabilizers on delicate fabrics. Once your sewing machine has finished stitching out a design section, you should use one hand to hold down any loose edges of fabric and then lift the presser foot with the other hand.
Finally, knotting may occur if your machine isn’t properly serviced or threaded correctly before starting an embroidery job. To avoid knotting issues, ensure that you check all machine components including tensions and needle size before stitching out any design. You should also wind bobbins with an adequate amount of thread so that they won’t run out mid-project or become tangled and knotted in grooves between spool pins (if applicable).
Problems with digitizing
Digitizing is a process that turns artwork into something that can be embroidered by a sewing machine. It’s an essential part of embroidery, but it’s difficult to master and often can result in unexpected problems at the time of stitching. There are several common issues encountered when a user attempts to use existing software programs to digitize designs for sewing machines.
The first common problem encountered is selecting the right stitch type for the job. Many software programs offer various different stitch types, so it’s important to make sure you select the right one for your project. An incorrect selection will result in additional time re-digitizing or even having to start over completely.
Another problem occurs when overlapping lines are used during embroidery production. This can create unintended affects such as thread piling or tangling, to name a few; resulting in missed stitches or fabric damage during stitching. The solution here is to use flash fill function which helps prevent thread overlap when creating complex patterns with lines and shapes.
Finally, many users may be unaware of limitations associated with specific machines; these should be taken into account when choosing software for digitizing embroidery designs. Some machines may have built-in limitations on what kind of designs they can produce, especially if they’re an older model without modern updates; whereas newer models may have design sizes/capacities that need to be taken into consideration prior to execution of design applications on those machines.
Tension issues
When embroidering, one of the most common issues is sound or tension-based. This can manifest as thread loops on the underside (sometimes referred to as ‘bird’nesting’) or skipped stitches, especially at the beginning and end of a given design. If you are experiencing these issues, there are several possible causes and solutions:
Thread: Check the thread type and weight you are using; heavyweight threads require heavier needles – 90/14 is standard for lightweight threads such as rayon, and 110/18 for heavier threads such as polyester. Always refer to your machine manual for specific information about needle types.
Bobbin case: Make sure your bobbin case is properly threaded with no loops or lines caught in the tension spring; always refer to manufacturer instructions when replacing your bobbin case.
Needle: Check that your needle is not bent or damaged — replace if necessary — and ensure it has been inserted correctly. Change needle sizes according to thread type, ensuring they have been correctly inserted according to manufacturer instructions.
Tension settings: Adjusting the top tension dial on the machine can help reduce looping, skipping or bird nesting — if there are too many loops in particular then loosen slightly, or tighten if the underside looks too loose or ‘sloppy’. UltimateFlock™ products may require special considerations for top tension that differ from other traditional embroidery processes – please refer to our instruction manual/website for details on these materials as needed.
Finalizing custom embroidery designs
After you have completed all of the previous steps, the final step to creating custom embroidery designs is to finalize your design before stitching. This step is very important as it can help correct any potential problems in the design and ensure that you get a quality finished product.
To finalize custom embroidery designs, follow these steps:
- Cut away excess stabilizer around the design – Stabilizers are necessary for machine embroidery, but can be tricky to handle. Be sure to cut away all of the excess stabilizer that’s surrounding your design for cleaner results.
- Hoop the fabric and stabilizer – To ensure that your design has enough tension, use a hoop on the machine or frame so that the fabric remains taut while stitching.
- Set up machine for embroidery design – Different machines have different threading needs, so refer to your owner’s manual or youtube tutorials for tips on threading and adjusting settings according to your specific model of machine and type of thread used in a particular project-
- Place spool of matching thread onto machine’s spool pin – Place the correct matching thread spool onto the machines spool pin before starting with a test run of stitching
- Prime machine, set speed and adjust tension levels – Choose an appropriate speed (not too slow or fast) such that both tension levels between top and bobbin threads remain consistent during stitches
- Test stitch a small patch of your design – Stitch out some parts of your chosen embroidery pattern and examine each stitch closely before fully committing with larger portions
- Team up with an experienced individual if needed – Ask friends, family members or local quilting shops for extra help when needed as each person has his/her own unique technique from which much wisdom can be gained
Removing excess stabilizer and threads
Once you have finished stitching your embroidery design, the next step is to remove any excess stabilizer and threads from the back of your fabric. This is important as it will increase the clarity of your design, and provide a pristine finish.
To do this, turn your project over so that the back side is facing up. Carefully use small scissors to remove any excess stabilizer from inside the embroidery design, being careful not to clip any stitches in the process.
Next, carefully snip away at any stray thread ends around the outside of your design single-handedly using small scissors. Once you’ve done this, tilt your project slightly downwards so that it reflects some light towards you. Then use pointed tweezers to gently pull away at any remaining bits of excess stabilizer which may be stuck in between threads of your embroidery design. Watch out for loose or slippery threads which can cause errors in stitches when pulled too hard!
Finally, shake off or vacuum away all excess lint or pieces of stabilizer left over from previous steps until all traces have been removed and only beautiful embroidered stitches remain on your fabric.
Ironing and finishing the embroidery design
When the embroidery design is complete it will be necessary to prepare it for use. This step is important because it adds a professional touch for the finished product. Use a warm, dry iron to flatten out the embroidery. Then use scissors to trim away any excess thread used during the stitching process.
For a clothing item that has been embroidered, additional steps need to be taken. It’s possible to finish seams with an overlock machine or bias tape trim by hand. To make sure that the edges won’t fray, they can be coated with a fabric glue or tied off with knots at each end before being followed up with an ironing or pressing of some sort in order to ensure a neat appearance. You may also wish to add buttons or embellishments as desired.
Conclusion
Creating custom embroidery designs with a machine is a precise process that takes patience and practice, but the payoff can be quite rewarding. Once you have chosen the correct design program and format, created your design file, edited it to ensure all lines and details are perfect, and tested the stitch outs on several fabrics, you can confidently move forward in creating the best possible embroidery designs.
Embroidery machines have come a long way since their invention, making it easier than ever for both professionals and hobbyists alike to craft beautiful works of art. Taking the time to learn about setting up your custom embroidery designs can help you get more consistent results in less time – resulting in successful projects that will make any crafter proud.
See Also-
- Best Embroidery Machine For Custom Designs 2023
- Best Computerized Embroidery Machine 2023
- Best Embroidery Machine For Beginners 2023
- Best Embroidery Machine For Large Designs 2023
- Best Embroidery Machine For Small Business 2023