
I.Introduction
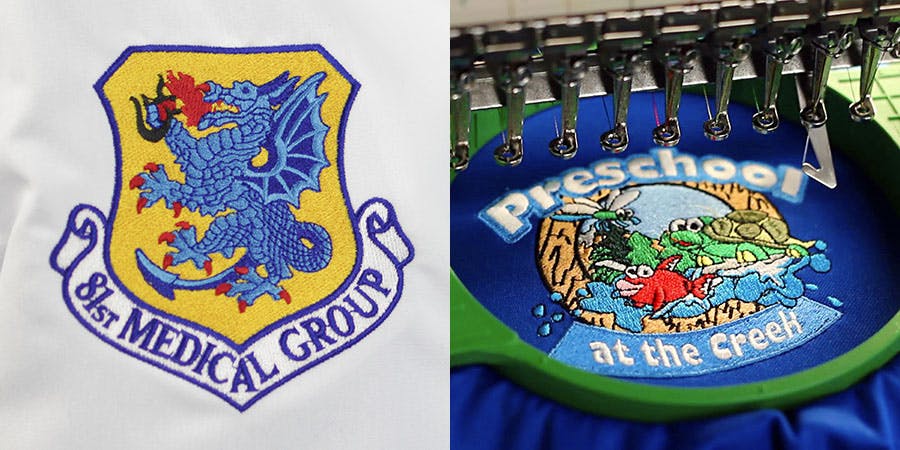
- Embroidery is a decorative art of stitching designs onto fabric using a needle and thread. Custom logos can be embroidered onto various items such as apparel, hats, bags, and more. Embroidery adds a professional and personalized touch to these items and can be used for branding or personalization purposes.

- Using machine embroidery for custom logos offers several benefits over traditional hand embroidery. Machine embroidery is faster, more accurate, and can produce consistent results. This makes it an ideal choice for large orders or when a specific logo needs to be replicated multiple times. Additionally, machine embroidery allows for a wider range of design options and can produce more intricate and detailed logos. Overall, machine embroidery is a cost-effective and efficient way to create high-quality custom logos.
Materials needed
To create custom embroidery logos, you will need the following materials:
- Machine embroidery thread: High-quality thread specifically designed for use in embroidery machines. It comes in a wide range of colors and can be purchased in individual spools or in sets.
- Embroidery machine: A specialized sewing machine designed to create embroidery designs on fabric. There are different types of embroidery machines, ranging from basic models to high-end machines with advanced features.
- Fabric: The material onto which the embroidery will be stitched. Common fabrics used for embroidery include cotton, linen, and polyester.
- Stabilizer: A backing material that is placed behind the fabric during the embroidery process. It helps to prevent the fabric from stretching or puckering and ensures that the embroidery design is smooth and even.
- Scissors: Sharp scissors are essential for cutting thread and trimming excess stabilizer from the finished embroidery design.
- Design software: Software programs used to create and edit embroidery designs. These programs allow you to create custom designs or modify existing ones to meet your needs
III. Preparing the design
Before beginning the embroidery process, the design must be prepared. This involves the following steps:
- Design creation: The design can be created using design software or obtained from an existing image file. The design should be appropriate in size and complexity for the fabric and embroidery machine being used.
- Choosing the thread colors: The appropriate thread colors should be chosen to match the design and fabric being used. It is important to use high-quality thread to ensure the design lasts long and looks professional.
- Saving and transferring the design to the machine: The design should be saved in a format that is compatible with the embroidery machine being used. The design can then be transferred to the machine either by USB or wirelessly if the machine has such features. Once the design is uploaded, it can be edited, resized, or repositioned on the fabric as desired.
Setting up the embroidery machine
Once the design has been prepared and transferred to the embroidery machine, the following steps should be taken to set up the machine:
- Hooping the fabric: The fabric should be hooped tightly to ensure that the embroidery design is stitched evenly and without puckering. This involves placing the fabric over the embroidery hoop and tightening it securely.
- Attaching the stabilizer: The stabilizer should be cut to size and attached to the back of the fabric using adhesive or basting stitches. This will prevent the fabric from stretching or puckering during the embroidery process.
- Threading the machine: The machine should be threaded with the appropriate color thread and the needle should be inserted. The embroidery machine manual should be consulted for the correct threading process.
- Setting up the design on the machine: The design should be positioned on the fabric as desired using the embroidery machine’s positioning features. The machine should be set to the appropriate settings for the fabric and design being used, such as stitch density, stitch length, and embroidery speed. Once the setup is complete, the embroidery process can begin.
Embroidering the logo
Once the embroidery machine is set up, the logo can be embroidered using the following steps:
- Starting the machine: Once the embroidery machine is ready, the start button can be pressed to begin the embroidery process. The machine will automatically follow the design, stitching the logo onto the fabric.
- Monitoring the progress: While the machine is embroidering the logo, it is important to monitor the progress to ensure that the embroidery is proceeding as desired. Any issues, such as thread breakage or puckering, should be addressed promptly.
- Changing thread colors as needed: As the machine progresses through the design, the thread color may need to be changed to match the design. The machine will prompt the user to change the thread color at the appropriate time.
- Removing the fabric from the hoop: Once the embroidery is complete, the fabric can be removed from the hoop. Care should be taken to avoid damaging the embroidery or the fabric during this process. Any excess stabilizer should be trimmed away using scissors. The finished embroidered logo can then be used as desired.
Finishing touches
After the logo has been embroidered, the following steps should be taken to complete the process:
- Trimming any excess thread: Any excess thread should be carefully trimmed away using sharp scissors. This will ensure that the embroidered logo looks neat and tidy.
- Removing the stabilizer: The stabilizer should be removed from the back of the fabric. This can be done by tearing away the excess stabilizer or cutting it away using scissors. Care should be taken to avoid damaging the embroidery or the fabric.
- Pressing the embroidered logo: The finished embroidered logo should be pressed using a hot iron to set the stitches and give the logo a professional finish. The fabric should be placed face down on a pressing surface and the iron should be applied to the back of the logo. This will help to flatten any puckering and ensure that the logo looks smooth and even. Once the pressing is complete, the embroidered logo is ready for use.
VII. Conclusion
Embroidery is a great way to create custom logos for a variety of purposes. The benefits of using custom logos include:
- Benefits of custom logos: Custom logos are a great way to promote brand identity, improve recognition, and create a professional look for any business or organization.
- Recap of the embroidery process: To create an embroidered logo, the design must first be created or obtained and transferred to the embroidery machine. The machine should then be set up with the appropriate materials and settings, and the logo can be embroidered. Once the embroidery is complete, the finished logo should be trimmed, the stabilizer removed, and the logo pressed to give it a professional finish.
- Final thoughts and recommendations: Embroidery can be a time-consuming and intricate process, but with the right materials and equipment, anyone can create a professional-looking logo. It is important to use high-quality materials, follow the instructions carefully, and take the time to monitor the embroidery process to ensure the best results. With a little practice, anyone can create beautiful embroidered logos that are sure to impress.
See Also-
- Best Embroidery Machine For Hoodies 2023
- Best Embroidery Machine 2023
- Best Embroidery Machine Under $1000 In 2023
- Best Embroidery Machine For Monogramming 2023
- Best Embroidery Machine For Hats 2023