
Last Updated on May 10, 2023 by Anna Dees
Introduction
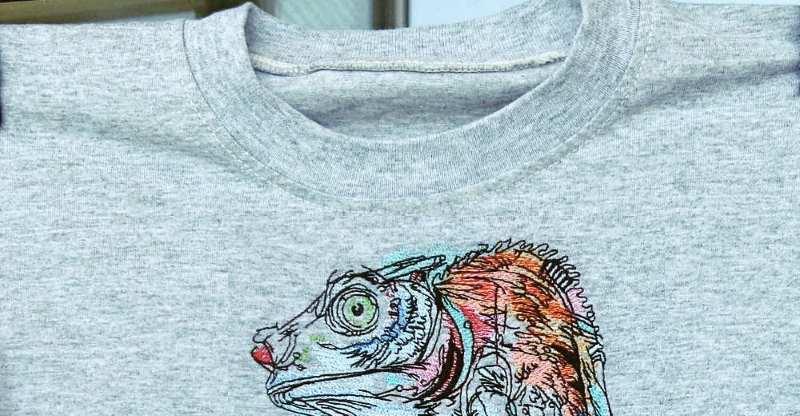
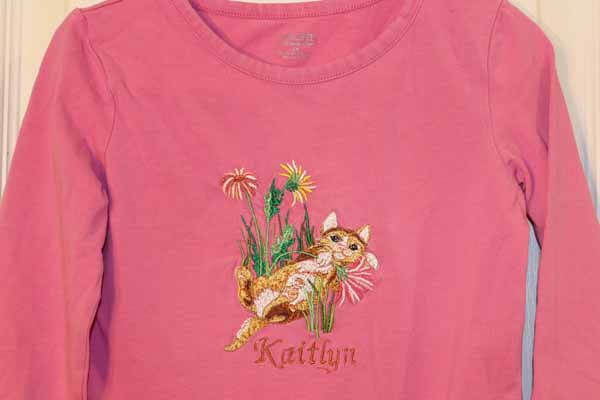
Embroidery is the art of decorating fabric or other materials with needle and thread or yarn. It has been a popular form of embellishment for centuries and is commonly seen on various types of apparel, including shirts, hats, jackets, and bags.
One of the reasons embroidery is so popular on apparel is that it adds a unique and personalized touch to the garment. Embroidery can be used to display logos, names, or designs, and can be done in a variety of colors and styles to match the individual’s preferences.

Machine embroidery has become increasingly popular in recent years, as it allows for faster and more precise stitching than traditional hand embroidery. Machine embroidery also offers a range of benefits, including:
- Efficiency: Machine embroidery allows for faster stitching, making it an ideal choice for bulk orders or large projects.
- Precision: With the use of computerized designs and digital machines, machine embroidery produces consistent and precise stitching every time.
- Versatility: Machine embroidery can be used on a wide range of fabrics, including delicate fabrics like silk and velvet.
- Customization: Machine embroidery can be easily customized to suit the individual’s preferences, whether it be in terms of design, color, or size.
Overall, machine embroidery offers a convenient and efficient way to add a personal touch to apparel and other items.
Equipment Needed
To start with machine embroidery, you’ll need a few essential pieces of equipment:
- Embroidery machine: This is the most important piece of equipment you’ll need for machine embroidery. It is a computerized sewing machine that allows you to stitch designs onto fabric using an embroidery hoop.
- Stabilizer: This is a material that is placed under the fabric to keep it stable and prevent it from moving during stitching. There are different types of stabilizers available, including tear-away, cut-away, and water-soluble.
- Thread: You’ll need thread specifically designed for embroidery. These threads are typically thicker than regular sewing threads and come in a wide range of colors.
There are various types of embroidery machines available on the market, each with its own unique features and capabilities. Here are a few examples:
- Single-needle embroidery machines: These are entry-level machines that are ideal for beginners or small home-based businesses. They typically have a single needle and can embroider designs up to 8 inches in size.
- Multi-needle embroidery machines: These machines have multiple needles (usually between 4 and 10) that allow you to embroider multiple colors at once. They are faster and more efficient than single-needle machines and can handle larger designs.
- Industrial embroidery machines: These machines are designed for commercial use and are capable of producing large quantities of embroidered items quickly. They typically have a high number of needles and can handle heavy-duty fabrics.
Some additional features to consider when selecting an embroidery machine include:
- Hoop size: This refers to the maximum size of the embroidery hoop that the machine can accommodate. Larger hoop sizes allow you to embroider larger designs.
- Connectivity: Some machines can be connected to a computer or mobile device, allowing you to transfer designs directly to the machine.
- Built-in designs: Some machines come with built-in designs, allowing you to start embroidering right away without having to create your own designs.
Overall, the type of embroidery machine you choose will depend on your needs and budget. It’s important to research and compare different machines before making a purchase to ensure you select the best machine for your needs.
III. Preparing the Design
Before you can start embroidering a design using a machine, you need to create or choose a design to embroider. Here are some options:
- Creating your own design: You can create your own design using graphic design software, such as Adobe Illustrator or CorelDRAW. Once you have created your design, you’ll need to save it in a format that is compatible with your embroidery machine.
- Purchasing a design: There are many websites that offer embroidery designs for purchase. These designs are typically available in a range of formats and sizes, allowing you to select the one that best suits your needs.
- Using built-in designs: If your embroidery machine has built-in designs, you can select one of these designs to embroider.
Once you have selected a design, you’ll need to prepare the design file for machine embroidery. Here are the steps you’ll need to follow:
- Convert the design file to a format that is compatible with your embroidery machine. Most machines can read designs in formats such as .DST, .PES, or .JEF.
- Open the design file in embroidery software. Embroidery software allows you to adjust the size and placement of the design, as well as choose thread colors and stitch types.
- Add any necessary details, such as text or additional shapes, to the design.
- Save the design file to a USB drive or other storage device that can be connected to your embroidery machine.
- Load the design file onto your embroidery machine and position the fabric in the embroidery hoop.
- Attach the stabilizer to the fabric to keep it stable during stitching.
- Start the embroidery machine and watch as it stitches the design onto the fabric.
By following these steps, you’ll be able to create and prepare a design file for machine embroidery, allowing you to add personalized and unique designs to your apparel or other items.
Preparing the Apparel
Before you start embroidering your design onto your apparel, you need to prepare the garment for stitching. Here are some steps you’ll need to follow:
- Choose the placement of the design on the garment. You can use a measuring tape to ensure that the design is centered and at the right height.
- Hoop the garment with the stabilizer. This involves placing the stabilizer underneath the garment and then sandwiching both between the two hoops of the embroidery machine. It’s important to make sure that the fabric is taut but not too tight to avoid puckering or distortion.
- Attach the embroidery hoop to the machine and make sure that the needle is aligned with the center of the design.
- Load the design file onto the embroidery machine and adjust any settings as necessary.
Now that your garment is properly hooped, you’ll need to select the appropriate stabilizer for your project. There are several types of stabilizers available, including:
- Tear-away stabilizers: These stabilizers are designed to be torn away from the fabric after stitching is complete. They are ideal for lighter-weight fabrics and designs with low stitch density.
- Cut-away stabilizers: These stabilizers are cut away from the fabric after stitching is complete. They are ideal for heavier-weight fabrics and designs with high stitch density.
- Water-soluble stabilizers: These stabilizers dissolve in water and are ideal for designs that will be in contact with the skin, such as collars or cuffs.
When selecting a stabilizer, it’s important to consider the type of fabric you’ll be embroidering on, as well as the size and complexity of the design. Thicker fabrics and larger designs will require a heavier stabilizer, while lighter-weight fabrics and smaller designs can be embroidered with a lighter stabilizer. It’s also important to consider the finished appearance of the garment, as some stabilizers can leave a residue or impression on the fabric that may be visible even after the stabilizer is removed.
By properly hooping your garment and selecting the appropriate stabilizer, you can ensure that your machine embroidery project is successful and produces a high-quality finished product.
Conclusion
Embroidering t-shirts and other apparel with a machine can seem intimidating at first, but by following the proper steps, it can be a fun and rewarding experience. Here’s a quick recap of the steps involved:
- Choose or create a design and prepare the design file for machine embroidery.
- Hoop the garment with the appropriate stabilizer.
- Load the design file onto the embroidery machine and adjust any settings as necessary.
- Embroider the design onto the garment, making sure to monitor the machine for any issues.
By taking the time to properly prepare both the design and the garment, you can ensure that your machine embroidery project turns out great. Don’t be afraid to experiment with different designs and techniques to create unique and personalized apparel.
In conclusion, machine embroidery is a great way to add a personal touch to your t-shirts and other apparel. With a little practice and the right equipment, you can create beautiful designs that will stand out from the crowd. So why not give it a try? You might just discover a new hobby that you love.
See Also-
- Best Embroidery Machine For Custom Designs 2023
- Best Computerized Embroidery Machine 2023
- Best Embroidery Machine For Beginners 2023
- Best Embroidery Machine For Large Designs 2023
- Best Embroidery Machine For Small Business 2023