
Last Updated on March 7, 2023 by Anna Dees
 Image Source: instructables.com
Embroidery stitch is a great way to add design and dimension to your projects. It can be used to create interesting patterns and designs on fabric, as well as being used to attach two pieces of fabric together. When starting an embroidery stitch, it is important to choose the right thread and needle for the project.
There are a few ways to start an embroidery stitch and the method you use will depend on the type of fabric you are working with and the design of your project. In this blog post, we will show you how to start an embroidery stitch on various types of fabrics.
Guide On How To Start An Embroidery Stitch
There are a variety of ways to start an embroidery stitch, but the following is a guide on how to start with the basic straight stitch. You will need an embroidery hoop, embroidery floss, needle, and fabric.
- Start by threading your needle with a length of embroidery floss. knot the end of the thread to secure it.
- Next, you will want to find the center of your fabric. To do this, fold your fabric in half and then in half again. Once you have found the center, mark it with a pin or pencil.
- Now that you have found the center of your fabric, place the embroidery hoop around it. Tighten the hoop so that the fabric is tight, but not too tight.
- Start your stitch by pushing the needle up through the fabric from the back side.
- Then, take a small stitch on the surface of the fabric and pull the thread through.
- Finally, push the needle back down through the fabric a little ways from where you just came up. Continue this process until you have completed your desired design.
By following these steps, you will have successfully completed a basic straight stitch.
Different Basic Embroidery Stitches

Image Source: aprettyfix.com
There are a ton of different embroidery stitches out there, but we’re going to focus on some of the most basic, essential stitches. These are the stitches that you’ll use most often, and they’re great for getting started with embroidery.
Running Stitch
The first stitch we’ll look at is the running stitch. The running stitch is a simple stitch that’s great for outlining shapes or for sewing two pieces of fabric together.
To make a running stitch, simply bring your needle up through the fabric, then back down a short distance away. Continue this pattern, making sure that your stitches are all the same length. You can make your stitches as long or as short as you like.
Backstitch
The backstitch is a slightly more advanced stitch, but it’s still fairly easy to do. The backstitch is great for outline shapes or for sewing two pieces of fabric together.
To make a backstitch, start by making a small stitch forward. Then, instead of going back down through the fabric, come up through the fabric a short distance behind your first stitch. This will create a small loop.
Bring your needle back down through the fabric, coming up in front of your first stitch. Then, make another small stitch forward. Continue this pattern, making sure that your stitches are all the same length. You can make your stitches as long or as short as you like.
Satin Stitch
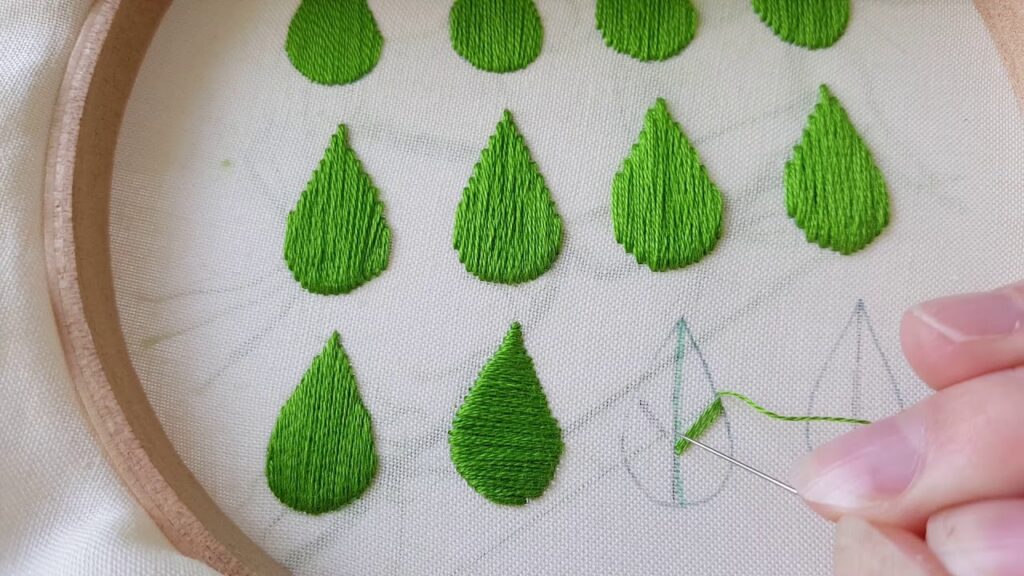
Image Source: YouTube.com
The satin stitch is a slightly more advanced stitch, but it’s still fairly easy to do. The satin stitch is great for filling in shapes or for adding texture and dimension to your embroidery.
To start a satin stitch, bring your needle up through the fabric at the starting point of your design. Then, take a small stitch – about 1/8” (3 mm) – and come back up through the fabric just a tiny bit further from where you first came up.
Now, instead of taking your next stitch through the fabric, take it through the “loop” of thread that’s just behind your needle. Pull your thread all the way through and then gently snug up the stitch so that the fabric is nice and tight against the needle.
Repeat these steps, taking each new stitch through the previous loop of thread, until you’ve filled in the shape or area that you’re stitching.
To end your satin stitch, take a tiny stitch through the fabric to secure the thread and then snip off the excess.
These are just some of the most basic embroidery stitches. As you continue to practice, you’ll start to experiment with more advanced stitches and techniques.
Final Thoughts
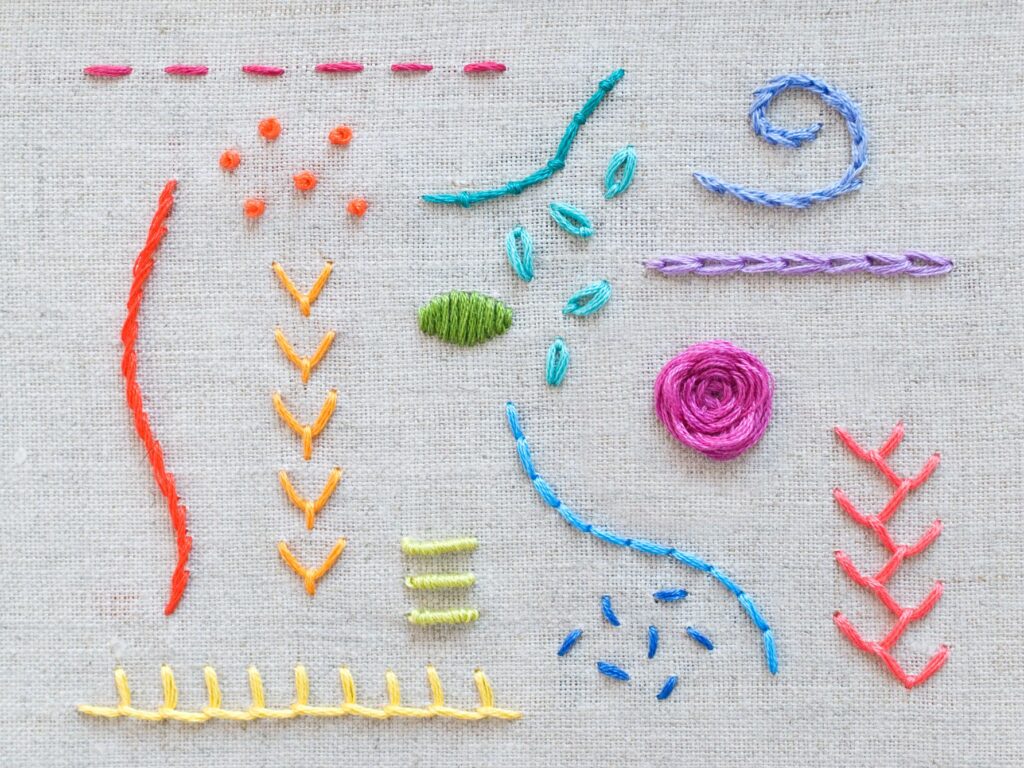
Image Source: thesprucecrafts.com
When starting an embroidery stitch, it’s important to be mindful of the direction in which you’re stitching. Always start your stitches in the same direction so that the finished product looks neat and uniform. If you’re unsure of which direction to start stitching in, take a look at a sample of embroidery or ask a professional for guidance.
Now that you know how to start an embroidery stitch, it’s time to get stitching! Use this guide as a reference point whenever you need a refresher on the basics of starting an embroidery stitch. With a little practice, you’ll be an embroidery pro in no time!

I’m Anna Dees, founder and editor of grandmaembroidery.com. I have been in the embroidery business for more than two decades, providing customers with quality fabric, threads, designs and helpful advice to create beautiful projects. My blog is dedicated to sharing my knowledge, tips and tricks related to embroidery as well as showcasing the work of fellow embroiderers around the world. I’m passionate about helping others learn more about this wonderful craft and fostering a sense of community among embroidery enthusiasts. With grandmaembroidery.com, I aim to be your go-to source for all things related to embroidery!